
How to Photograph Glass Products: The Complete Guide
Master the most challenging product photography skill. From lighting setups to AI-powered editing, everything you need to capture stunning glass images.
Glass is the ultimate test of a product photographer's skill. While other materials play nicely with standard lighting setups, glass fights back—reflecting everything in the room, showing what's behind it, and creating unpredictable light refractions that can ruin an otherwise perfect shot.
But here's the good news: once you understand why glass behaves the way it does, you can use that knowledge to create stunning images that showcase its beauty. In this comprehensive guide, we'll cover everything from fundamental physics to advanced AI-powered editing tools that make glass photography more accessible than ever in 2026.
📋 What You'll Learn
- Why glass is uniquely challenging (the physics)
- Essential equipment for glass photography
- 4 core lighting techniques that actually work
- Step-by-step setups for white & black backgrounds
- Cleaning & preparation best practices
- Post-production & AI tools for 2026
- Platform-specific requirements (Amazon, Etsy, TikTok)
 2")
🔬 Why Glass Is So Difficult to Photograph
Before you can master glass photography, you need to understand the three physical properties that make it so challenging. This isn't just theory—understanding these concepts will directly inform every lighting and setup decision you make.
Reflectivity
Glass acts as a mirror, reflecting everything in the environment—lights, camera, tripod, even you. Every object in your studio becomes a potential distraction in your final image.
Transparency
Unlike opaque products, glass shows what's behind it. Your background becomes part of the product itself, and any clutter or imperfections will show through.
Refraction
Light bends as it passes through glass, creating hotspots, color shifts, and distortions. Curved glass (like bottles) amplifies this effect, making lighting placement critical.
The solution to all three challenges is the same: control your light environment completely. Unlike other product photography where you light the product directly, with glass you're primarily lighting the background and letting that light define the glass edges. This fundamental shift in thinking is what separates amateur glass shots from professional ones.
 3")
Glass photographed on black background using dark field lighting technique
📷 Essential Equipment for Glass Photography
You don't need a fortune in gear to photograph glass well, but certain equipment makes the process dramatically easier. Here's what professionals use in 2026, with options for different budgets. For a deeper dive into camera selection, check out our DSLR vs Mirrorless comparison guide.
| Equipment | Purpose | Budget Option | Pro Option |
|---|---|---|---|
| Camera | High resolution capture | Sony A6400 / Canon R10 | Sony A7R V / Canon R5 |
| Lens | Sharp, distortion-free | 50mm f/1.8 prime | 90-105mm macro |
| Lighting | Controlled illumination | 2x speedlights + diffusers | Strobe + large softbox |
| Diffusion | Soften light, eliminate hotspots | White bedsheet / shower curtain | Scrim Jim / silk diffusion |
| Backgrounds | Define glass edges | White/black foam boards | Seamless paper rolls |
| Reflection Surface | Create product reflections | Black acrylic sheet | Professional plexiglass |
 4")
Manual camera settings give you full control over exposure for glass photography
🧤 Must-Have Accessories
Prevent fingerprints during handling
Remove dust specks instantly
Streak-free surface prep
Control reflections and edge definition
 5")
Keep ISO low (100-200) to capture maximum detail and avoid grain
💡 The 4 Core Lighting Techniques for Glass
Lighting glass is fundamentally different from lighting other products. Instead of illuminating the product directly, you're controlling what the glass sees and reflects. These four techniques form the foundation of all professional glass photography. For more on lighting techniques in product photography, see our dedicated guide.
 7")
Lighting setup diagram showing backlight positioning
 8")
Softbox positioning for even glass illumination
Backlighting (Bright Field)
Best for: E-commerce, white backgrounds, clean product shotsPlace your light source directly behind the glass, diffused through a large softbox or white panel. The glass appears bright and luminous, with dark edge lines that define its shape. This is the go-to technique for Amazon listings and catalog photography.
Dark Field Lighting
Best for: Dramatic shots, black backgrounds, premium productsThe inverse of backlighting. Use a black background and light the glass from the sides only. The glass edges glow bright against the dark background, creating a dramatic, high-end aesthetic perfect for luxury beverage photography and spirits.
Rim Lighting Technique
Best for: Hero shots, advertising, social mediaA sophisticated hybrid technique. Place a large softbox behind the glass, then block the center with a black card (flag). Light bleeds only around the edges, creating a luminous silhouette that carves the product out of a dark background. This technique has exploded in popularity for premium product photography.
Gradient Lighting
Best for: Depth, dimension, artistic shotsCreate a graduated background that transitions from light to dark (or vice versa). The glass picks up this gradient, adding depth and visual interest. You can achieve this by partially blocking your backlight or using a graduated backdrop.
⬜ Step-by-Step: White Background Glass Setup
White background shots are the e-commerce standard, required by platforms like Amazon and essential for consistent catalog imagery. Here's the proven workflow:
Position a large white surface (seamless paper or foam board) behind where your glass will sit. It should be at least 2-3 feet behind the product.
Place a softbox or diffused light behind the backdrop, pointing toward the camera. The white surface becomes your light source.
Place black foam boards on either side of the glass, just outside your frame. These create the dark edge lines that define your glass shape.
Start with ISO 100, f/11, and adjust shutter speed until the background is pure white without blowing out the glass. Use a tripod and remote shutter.
Take test shots and adjust flag positions to control edge definition. Move them closer for darker edges, further for softer lines.
⬛ Step-by-Step: Black Background Glass Setup
Black background glass photography creates dramatic, premium-looking images perfect for luxury brands, spirits, and high-end products. The technique is essentially the inverse of white background shooting.
 11")
Glass with liquid on black background—notice how edge lighting defines the shape
Use black seamless paper or velvet as your backdrop. The key is eliminating all stray light that could reflect in the glass.
Place white foam boards at 45° angles on either side of the glass. The glass will reflect these as bright edge lines.
Point your lights at the white reflector cards. The glass picks up the reflected light, creating glowing edges against the black background.
Place black acrylic or glossy black card under the glass to create an elegant product reflection. This adds depth and luxury feel.
🪟 The "Window Cutout" Technique
For dramatic dark field shots with defined highlights: Cut a window in black cardboard slightly smaller than your glass object. Place it between your light and the glass. The light passing through the cutout creates precise edge highlights while the surrounding black keeps the background dark. This low-budget trick produces results that rival expensive professional setups.
🧹 Cleaning & Preparation: The Critical Step Most Skip
Here's an uncomfortable truth: the number one cause of failed glass photography isn't lighting or equipment—it's inadequate cleaning. What's invisible to your eye becomes glaringly obvious at high resolution. A single fingerprint or dust speck can require 20+ minutes of retouching to remove.
 12")
Thorough cleaning is essential—even tiny smudges become visible at high resolution
✅ Professional Cleaning Workflow
Before the Shoot
- Put on lint-free cotton or nitrile gloves
- Spray glass cleaner onto microfiber cloth (never directly on glass)
- Wipe from top to bottom in one direction
- Use compressed air to remove remaining dust
- Inspect under strong light before placing on set
During the Shoot
- Keep gloves on when handling glass
- Have compressed air nearby for dust touchups
- Check for new dust after each repositioning
- Keep backup glass pieces ready
- Work in a draft-free environment
Never use paper towels (they leave lint), household glass cleaners with ammonia (can leave residue), or touch cleaned surfaces with bare hands. Even clean hands leave oils that show up on camera.
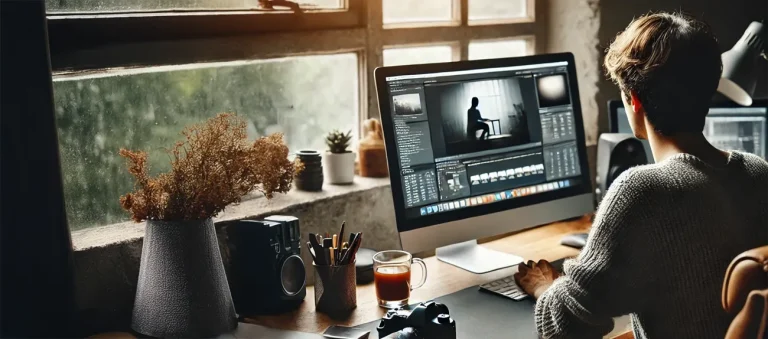
🤖 Post-Production & AI Tools for Glass Photography (2026)
Even with perfect technique, glass photography often requires post-production work. The good news? AI tools have dramatically reduced editing time in 2026. What once took hours in Photoshop can now be done in minutes. For a comprehensive overview, see our guide to AI photo generator tools.
 13")
The final result: clean, professional glass photography ready for e-commerce
⭐ Pro Photo Playground
Our AI-powered editing suite at ai.prophotostudio.net. Purpose-built for product photography with advanced reflection removal and glass-specific enhancement tools.
ai.prophotostudio.net🎨 Adobe Photoshop
Still the gold standard for glass retouching. Generative Fill and Content-Aware tools excel at removing reflections and imperfections.
From $20.99/mo🖼️ Claid.ai
AI-powered background generation and enhancement. Excellent for placing glass products in lifestyle scenes automatically.
From $15/mo✨ Topaz Labs
DeNoise AI and Sharpen AI are perfect for glass images that need clarity enhancement without losing edge definition.
$199 one-time🔧 Photoroom
Mobile-friendly background removal that handles glass transparency well. Great for quick e-commerce edits on the go.
From $12.99/mo📚 Related Resource: For detailed techniques on isolating glass products from backgrounds, check out our Ultimate Guide to Background Removal for Product Photos.
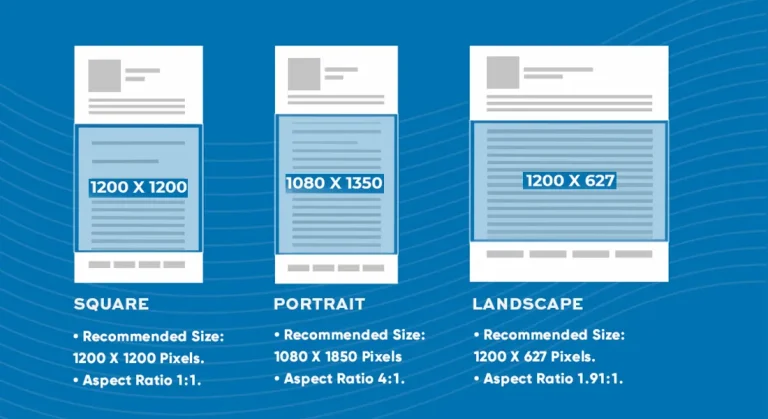
📱 Platform-Specific Requirements for Glass Products
Different e-commerce platforms have different image requirements. Here's what you need to know for glass products specifically:
| Platform | Image Size | Background | Glass-Specific Tips |
|---|---|---|---|
| Amazon | 2000×2000px min | Pure white (RGB 255,255,255) | Ensure edge definition visible against white |
| Etsy | 2000×2000px recommended | Flexible (lifestyle ok) | Show scale with props; lifestyle shots convert well |
| Shopify | 2048×2048px optimal | Consistent with brand | Multiple angles; zoom-friendly detail shots |
| TikTok Shop | 800×800px min | White or neutral | Video content outperforms static for glass |
🚫 Common Glass Photography Mistakes (And How to Fix Them)
❌ Lighting the glass directly
Creates hotspots and harsh reflections.
✅ Fix: Light the background or reflectors instead.
❌ Visible photographer reflection
You or your camera appear in the glass.
✅ Fix: Shoot through a hole in a large white card or use a longer lens.
❌ Undefined edges
Glass blends into background, losing shape.
✅ Fix: Add black flags (for white BG) or white cards (for black BG) at edges.
❌ Dust and fingerprints
Visible imperfections require extensive retouching.
✅ Fix: Follow professional cleaning workflow; always use gloves.
❌ Wrong white balance
Glass appears yellow, blue, or off-color.
✅ Fix: Use a gray card; shoot RAW for easy correction.
❌ Insufficient depth of field
Parts of glass are out of focus.
✅ Fix: Use f/8 to f/16; consider focus stacking for complex pieces.
❓ Frequently Asked Questions
📚 Related Articles
Need Professional Glass Product Photography?
Glass photography is one of our specialties at Pro Photo Studio. From delicate glassware to beverage bottles, we deliver stunning images that showcase your products at their best.
Get a Free Quote →✓ Professional studio setup ✓ Expert retouching included ✓ Fast turnaround

1 thought on “Glass Product Photography Guide 2026 (REFRESH)”
What’s up to all, how is all, I think every one is getting more from this site, and your views are pleasant designed for new visitors.