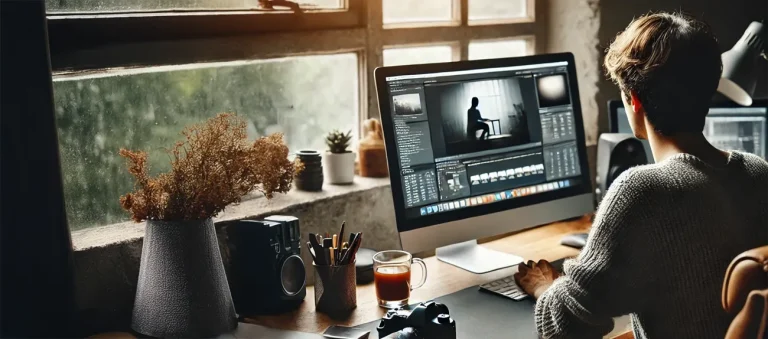
Few days ago, I sat down with Tsour Lee Adato, our veteran photographer who’s spent the last decade shooting for luxury brands at Pro Photo Studio. What struck me most wasn’t his impressive client list or the stunning images on his monitor – it was his surprising take on product photography setup.
“Everyone thinks you need expensive photography gear to create professional product photos,” he told me, gesturing at his studio’s worth of equipment. “But here’s the thing: understanding the fundamentals of a proper setup matters more than having the fanciest camera.”
He’s right. And after spending weeks researching and testing various configurations, I’ve discovered that creating an effective photography setup is both simpler and more nuanced than most people realize. Let’s break it down.
Table of Contents
The Foundation: Camera Choices Matter (But Not As Much As You Think)

When it comes to a great setup, your camera choice sets the foundation. But here’s the counterintuitive truth: in 2025, the gap between professional and consumer cameras has narrowed dramatically.
For a basic setup, you have two main paths:
The DSLR Route
If you’re serious about product photography, a DSLR or mirrorless camera gives you maximum control. But here’s what nobody tells you: that entry-level Canon or Nikon from a few years ago? It’s probably more than enough for most product shots.
The key specs for your photography setup include:
- Manual mode capabilities (essential for consistent results)
- Interchangeable lens support
- Good low-light performance (though less critical than you might think)
The Smartphone Option
Here’s a secret many professionals won’t admit: modern smartphones, when properly used in a well-planned professional setup, can produce remarkable results. The computational cell phone photography in recent phones can sometimes outperform traditional cameras for certain types of product shots

Lenses: The Real Game-Changer in Your Product Photography Setup
While camera bodies get all the attention, your lens choice can make or break your photography setup. After testing dozens of configurations, I’ll share my recommendations based on Sony equipment, as that’s what I’ve used extensively in my studio.
But don’t worry if you’re a Canon, Nikon, or other brand user – each manufacturer offers equivalent options that will serve you just as well.
The key is understanding the characteristics you need in each lens type for a setup. Here are the three lenses that deserve a place in your kit:
The 100mm Macro
For Sony users, I recommend the Sony FE 90mm f/2.8 Macro G OSS lens – this is your secret weapon for small setup scenarios.
Whether you’re photographing jewelry or electronic components, its 1:1 magnification ratio lets you capture details that make products pop on screen.
Canon users might opt for the EF 100mm f/2.8L Macro IS USM, while Nikon shooters can achieve similar results with the AF-S VR Micro-NIKKOR 105mm f/2.8G IF-ED.
The 60mm macro
For shorter macro work, I use the Sony FE 50mm f/2.8 Macro lens – think of this as your product photo setup workhorse. It’s perfect for medium-sized products and offers an ideal working distance for most setups.
Similar options include the Canon EF-S 60mm f/2.8 Macro USM or the Nikon AF-S Micro-NIKKOR 60mm f/2.8G ED.
The 24-70mm Zoom
My go-to is the Sony FE 24-70mm f/2.8 GM 2 lens – this is your Swiss Army knife, versatile enough to handle everything from small products to larger setups. The constant f/2.8 aperture ensures consistent exposure across your zoom range.
Canon users might consider the RF 24-70mm f/2.8L IS USM or EF 24-70mm f/2.8L II USM, while Nikon photographers could opt for the NIKKOR Z 24-70mm f/2.8 S or AF-S 24-70mm f/2.8E ED VR. Any of these will serve as a solid foundation.
Lighting: The Heart of Your Product Photography Setup
If there’s one area where your photography setup can’t afford to cut corners, it’s lighting. But here’s the good news: effective photography lighting doesn’t necessarily mean expensive lighting.
In fact, after analyzing hundreds of successful product shots, I’ve found that thoughtful light placement often matters more than expensive equipment.
Natural Light Setup
The most accessible photography setup often starts with window light. But here’s the uncomfortable truth that many beginners need to hear: while natural light can work for starting out or casual social media content, it’s simply not viable for serious commercial work, especially when dealing with larger brands or catalog projects.
| Challenges of Natural Light | Details |
|---|---|
| Inconsistency | Natural light changes throughout the day, making it impossible to maintain consistency across large product shoots. |
| Limited Control | You can’t adjust the intensity or direction of sunlight to highlight specific product features. |
| Scheduling Constraints | You’re limited to shooting during daylight hours and good weather. |
| Complex Products | Many products (especially reflective or transparent items) require precise light manipulation that natural light can’t provide. |
| Client Expectations | Professional brands expect consistent, replicable results that can match their existing product catalogs. |
While you can start with window light to learn the basics of your photography setup, plan to transition to artificial lighting as soon as possible if you’re aiming for professional work.
Artificial Lighting Solutions
For a controlled environment, artificial lighting is non-negotiable. Here’s a breakdown of options across different budget ranges:
| Budget Range | Lighting Options | Key Features |
|---|---|---|
| Entry Level (Under $500) | Neewer LED lights and basic softboxes |
|
| Mid-Range ($500-1500) | Godox lighting systems (AD200/AD400 Pro) |
|
| Professional ($1500+) | Aputure (LS 600d Pro, LS 300x), Nanlite (Forza series) |
|
Continuous Lighting Considerations
When selecting continuous lighting, consider these factors:
| Category | Options | Key Features |
|---|---|---|
| Entry Level | Neewer LED panels and softboxes ($200-400 range) |
|
| Mid-Range | Godox LED panels ($400-800) |
|
| Professional | Aputure LS series ($800-2000+) |
|
| Professional | Nanlite Forza series ($600-1500) |
|
Strobe Lighting Options
For serious product photography setup needs:
| Category | Options |
|---|---|
| Entry Level |
|
| Mid-Range |
|
| Professional |
|
Advanced Lighting Techniques
Once you’ve mastered the basics, these advanced lighting techniques can elevate your product setup:
- Multi-light setups for complex products
- Light painting for dramatic effects
- Cross-polarization for reflective surfaces
- Focus stacking with consistent lighting
Let’s break down the essential components of a proper lighting setup:
Main Light Source
Whether you’re using natural window light (still incredibly effective) or artificial lighting, the key is control. Your photo setup should include:
- Diffusion materials (simple white sheets work surprisingly well)
- Positioning options (think adjustable stands or mounting points)
- Consistent color temperature (crucial for accurate product representation)
Reflectors and Modifiers
Here’s where you can get creative with your setup. While professional reflectors are nice, white foam board can work just as well in many situations. The key is understanding how to position these elements within your setup to control shadows and highlights.
Communication
The first and most important skill for any photographer is the ability to sell their services, especially for beginners. Very often, the inability to clearly describe one’s terms of collaboration or even promotional integrations becomes a serious obstacle to showcasing their talent. One possible solution is to seek help from a professional paper writing service Edubirdie, where experts can assist you with the writing aspect.
In the competitive field of product photography, strong communication and presentation skills can be just as vital as technical expertise.
Building Your Complete Product Photography Setup
| Essential Element | Description |
|---|---|
| Camera and Lenses | Invest in a reliable camera and versatile lenses to capture crisp, detailed product images. |
| Tripod | A non-negotiable tool for sharp, stable images. Keeps your shots consistent and professional. |
| Lighting Equipment | Whether natural or artificial, lighting is critical for highlighting product details and features. |
| Backdrop Solutions | Clean, consistent backdrops ensure your product stands out without distractions. |
| Props and Styling Elements | Add context and personality to your images with carefully chosen props and styling. |
| Post-Processing Tools | Software like Adobe Creative Suite or AI-powered tools to refine images and add the finishing touches. |
The Software Side
| Editing Capability | Description |
|---|---|
| Exposure Adjustment | Correct exposure to ensure the product looks balanced and professional. |
| Color Correction | Adjust color tones to achieve accurate and visually appealing product representation. |
| Background Cleanup | Remove distractions and ensure a clean, professional look for product-focused imagery. |
| Basic Retouching | Refine product details by removing imperfections and enhancing key features. |
Pro Tips for Optimizing Your Product Photography Setup
After speaking with dozens of professional photographers, here are some key insights for maximizing your setup:
- Keep your product photography setup modular – being able to quickly modify your configuration saves time and expands capabilities
- Invest in quality diffusion materials – they’re the unsung heroes of good product photos
- Create templates for common product photography setup configurations
- Document your successful setups for consistent results
When to Upgrade Your Setup?
While a basic setup can take you far, there are times when upgrading makes sense. Here are the key indicators:
- Your current setup limits the types of products you can photograph
- Clients are requesting specific types of shots your equipment can’t deliver
- You’re spending too much time working around equipment limitations
As we move through 2025, several trends are shaping the future setup:
- AI-enhanced editing tools
- Automated product photography systems
- Advanced lighting control through smartphone apps
- Virtual set design and previsualization
Conclusion: Building Your Perfect Setup
The perfect product photography setup isn’t about having the most expensive gear – it’s about understanding how to use what you have effectively. Whether you’re just starting out or looking to upgrade your existing setup, focus on building a system that works for your specific needs.
Remember Adato’s words: “The best product photography setup is the one that helps you consistently create images that sell products.”
Frequently Asked Questions (FAQs)
For a starter product photography setup, you’ll need:
- A camera (DSLR or recent smartphone)
- A sturdy tripod
- Basic lighting (window light or affordable LED panel)
- White bounce cards
- A clean backdrop
- Basic editing software
The key is starting simple and expanding your setup as your needs grow. Many successful product photographers started with minimal equipment and gradually upgraded their setup based on specific client needs.
Contrary to popular belief, you don’t need a massive studio. A basic setup can fit in a 6×6 foot space. Here’s how to maximize small spaces:
- Use collapsible backgrounds
- Invest in compact lighting solutions
- Consider portable product photography setup options
- Utilize wall space for storage
- Create a modular setup that can be easily assembled/disassembled
Photographing reflective products requires a specialized product photography setup:
- Use large, diffused light sources to minimize harsh reflections
- Position lights at indirect angles (often 45 degrees or more)
- Consider using polarizing filters
- Employ black flags to control unwanted reflections
For photographers who need to shoot on location, a portable product photography setup should include:
- Collapsible backdrop system
- Battery-powered LED panels
- Lightweight tripod
- Fold-up reflectors
- Portable softboxes
- Carrying case for organization
Jewelry requires a specialized product photography setup:
- Macro lens (60mm or 100mm)
- Focus stacking capabilities
- Multiple small light sources
- Clean acrylic risers
- Black and white reflective cards
- Anti-vibration surface
Cost-effective improvements for your product photography setup include:
- DIY light modifiers using household materials
- Repurposed materials for backgrounds
- Second-hand equipment from reputable sellers
- Mobile apps for basic editing
- Natural light optimization techniques
if you’re looking to increase your online conversion but still feel you are not sure where to start – check out these resources below: