Hey there! Have you ever wondered what a 4×6 photo actually measures and why it’s such a popular size?
Let’s explore the dimensions and reasons behind its popularity and even learn how to resize images to this format in Photoshop.
Stick around for some handy tips and step-by-step instructions!
Table of Contents
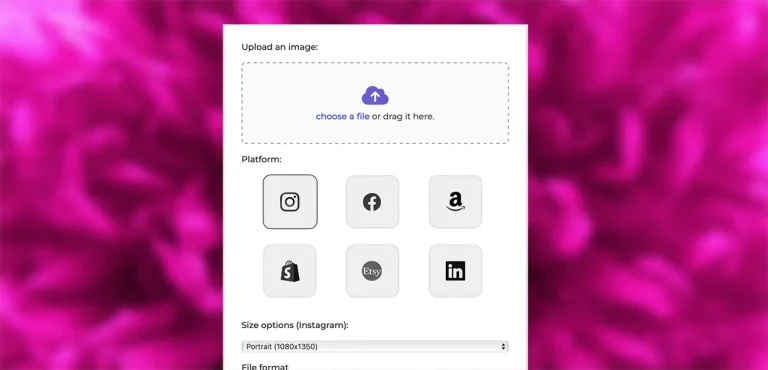
Use our Free Image Resizer
Resize your photos now with the Pro Photo Studio Image Resizer!
Understanding the 4×6 Photo Dimensions
So, what’s the deal with a 4×6 photo? While it sounds straightforward, there’s a bit more to it.
- In Inches: A standard 4×6 photo is approximately 4 inches by 5⅞ inches. Yep, it’s just a tad shy of a full 6 inches.
- In Centimeters: That translates to about 10 cm x 15 cm.
- In Millimeters: Or if you prefer, 101 mm x 152 mm.
- In Pixels: This depends on the DPI (dots per inch) of your image:
- At 150 DPI: 600 x 900 pixels
- At 300 DPI: 1200 x 1800 pixels
Fun Fact: DPI stands for “dots per inch” and affects the clarity and quality of your printed photos. The higher the DPI, the sharper the image!
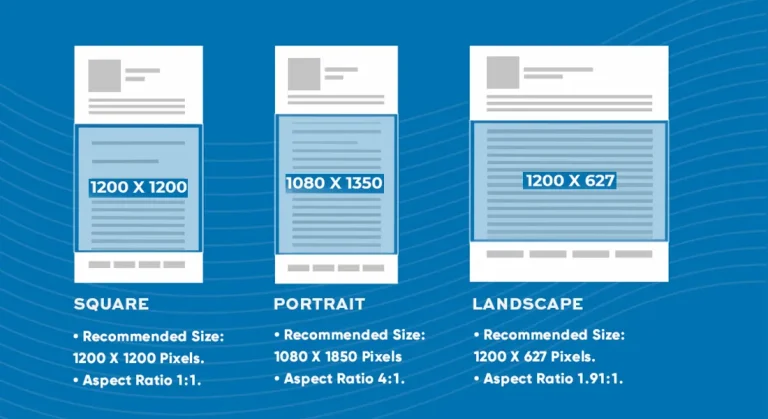
A 4×6 photo measures 4 inches by 6 inches, translating to 10.16 x 15.24 cm, with a 2:3 aspect ratio. At 300 DPI, the recommended resolution for a sharp print is 1200 x 1800 pixels.
This size is widely popular for its compatibility with photo frames and albums, fitting both traditional and digital photography standards. A 4×6 dimension captures details clearly, making it a favorite for prints, DIY projects, and scrapbooks.
Why is 4×6 the Most Common Aspect Ratio?

Great question! The 4×6 photo size is everywhere, and here’s why:
- 3:2 Aspect Ratio: A 4×6 photo has a 3:2 aspect ratio, matching the standard ratio used in 35mm film photography.
- Digital Continuity: Modern digital camera sensors are designed with this same ratio, ensuring consistency between what you see and what you get.
- Photo Albums Galore: Most photo albums and frames are built for 4×6 photos, making it the go-to size for memories.
Did You Know? The 3:2 ratio means for every 3 units of width, there’s 2 units of height. It’s a classic look that’s pleasing to the eye!
Use our Free Image Resizer
Resize your photos now with the Pro Photo Studio Image Resizer!
Common Issues with 4×6 Photos ⚠️
Cropping Concerns
When you send your photos off to be printed:
- Trimmed Edges: Photo labs often trim about 3 millimeters off each side of your photo.
- Inconsistent Trimming: The trimming process isn’t always precise. Important details near the edges might get cut off.
Tip: Keep critical elements like faces or text away from the very edges of your photo to avoid unexpected cropping.
Resolution Matters
Printing quality can suffer if your image isn’t up to snuff.
- Minimum Pixels: For a decent 4×6 print, ensure your image is at least 480 x 640 pixels.
- Check in Photoshop: You can verify and adjust your image size by:
- Going to Image > Image Size
- Switching the units to Pixels
Remember: A higher resolution means a clearer, sharper print!
How to Resize a 4×6 Image in Photoshop
Got a photo that doesn’t quite fit the 4×6 frame? No worries! Here’s how you can resize it in Adobe Photoshop without losing quality.
Step-by-Step Guide
Open Your Image:
- Launch Photoshop and open your desired image by clicking File > Open.

Access the Crop Tool:
- Select the Crop Tool from the toolbar on the left (it looks like two overlapping right angles).

Set the Aspect Ratio:
- At the top, you’ll see options for the Crop Tool. Enter 6 in for width and 4 in for height.
- Ensure the resolution is set to 300 pixels/inch for high-quality prints.

Adjust the Crop Box:
- A crop box will appear over your image.
- Move and resize the box to include the parts of the image you want to keep.

Crop the Image:
- Once you’re happy with the placement, press Enter or click the checkmark at the top to apply the crop.
Check the Image Size:
- Go to Image > Image Size to confirm the dimensions are 6 x 4 inches at 300 DPI.

Save Your Image:
- Click File > Save As to save your resized image.
- Choose your desired format (JPEG is common for photos) and save it with a new name to preserve the original.
Pro Tip: Always keep a copy of your original image. That way, you can go back and make adjustments if needed!
Use our Free Image Resizer
Resize your photos now with the Pro Photo Studio Image Resizer!
Wrapping Up
And there you have it! You now know all about the actual size of a 4×6 photo, why it’s such a staple in photography, and how to resize your images to fit perfectly.
Next time you’re printing photos or arranging them in an album, you’ll be equipped with the knowledge to make them look their best.
Happy shooting and editing!
if you’re looking to increase your online conversion but still feel you are not sure where to start – check out these resources below: